One of the easiest editing steps to help enhance your photography and take it to a higher level is basic sharpening. Now we are not going to get into the infamous RAW vs. JPEG file format debate, however, both file formats can benefit from some basic sharpening techniques to give the image that crisp, clear finished look. I am constantly amazed at what a little sharpening does to an image and how this simple step really can make a difference in your final product. After all, most digital images come out of camera a little low on contrast and sharpness.
I do all of my editing using a combination of Adobe Lightroom 3 and Adobe Photoshop CS5, but this technique will work with any earlier Photoshop editions from CS3 onward as well as with the Photoshop Elements program. The two sharpening techniques I use most are High Pass sharpening and Unsharp Mask Sharpening. In this example I have used a black and white image just so that the results are easier to see.
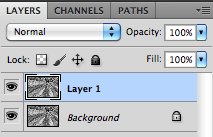
Whenever I do sharpening it is always the last step in the editing process for me so all my color, contrast and cropping is already completed. Once my image is all set, I usually flatten the image layers and then create a duplicate layer to which I will apply my sharpening. By using a duplicate layer it allows me to have a bit of control of the sharpening and to lower the opacity as needed to adjust it to taste.

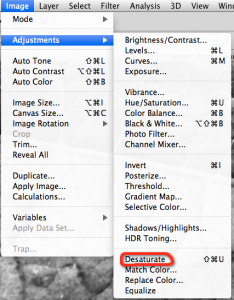
The High Pass sharpening technique is applied by having the duplicate layer highlighted and first desaturating the image by going to the Menu bar and clicking on
Image->Adjustments->Desaturate.

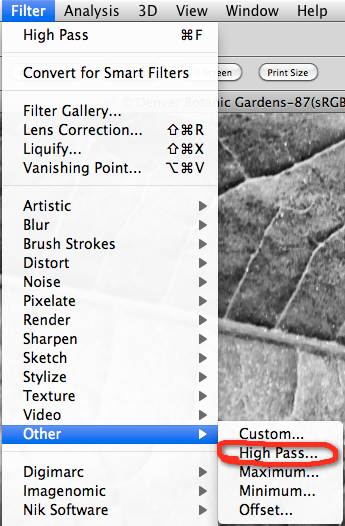
Next, go to the Filter->Other->High Pass option and select it.

This will bring up a dialog box that will allow you you to control the pixel radius size. Now there is no need to have an in depth knowledge of what pixel radius is and what it means, but more importantly what you want to do is start increasing the pixel radius until you see an outline of the edges of your photo. Often times I find myself in the 2-5 pixel radius range. Now, if you increase the pixel range too much you will start to see those familiar halos around all of the edges of your photo so be careful (You don’t want those halos). In most cases, I find that the adjusting the radius to what looks good to me and then backing off just a touch works well and keeps me from over-processing images. So dial in your radius which in this case I set at about 4.1 and click OK.

Wow, looks great, huh! Just kidding! we are not done yet. Next go to your image blending modes and change the layer from Normal to Overlay or Soft Light. The difference between the two is Overlay will give you a little more of the effect while soft light is a bit softer. Honestly, I almost always use a soft light blending mode for this technique.


Now click the layer off and on to see the difference. If it seems too much, lower the opacity of the layer and dial it in to where you want. For me in this black and white image I think it looks just fine and really brings out the texture I wanted to convey. The nice thing about the High Pass technique is since you are using a desaturated layer to find the edges you do not add any color cast or aberration to the photo.
If we wanted to do the same thing a bit easier, we can use the Unsharp Mask technique. Starting with your flattened image once again you first duplicate the layer. Next, go to the Menu bar and click on Filter->Sharpen->Unsharp Mask to bring up the sharpening dialogue box.


A nice basic level of sharpening is to set the Amount at 85%, the Radius at 1.0 pixel and the Threshold at 3 levels. This gives a very nice all inclusive sharpening without needing to understand the details of how each slider works. If you want a bit more sharpening, just increase the amount and the radius of the sharpening a bit. Be careful though, as it is very easy to over sharpen an image. As a good rule of thumb, I always constrain the sharpening amount to under 120% and the radius to under 2.0 pixels, but play around with the sliders a bit and get a feel for how they adjust your image. Always remember that you can lower the opacity of the layer as well if you need to back it off a bit.
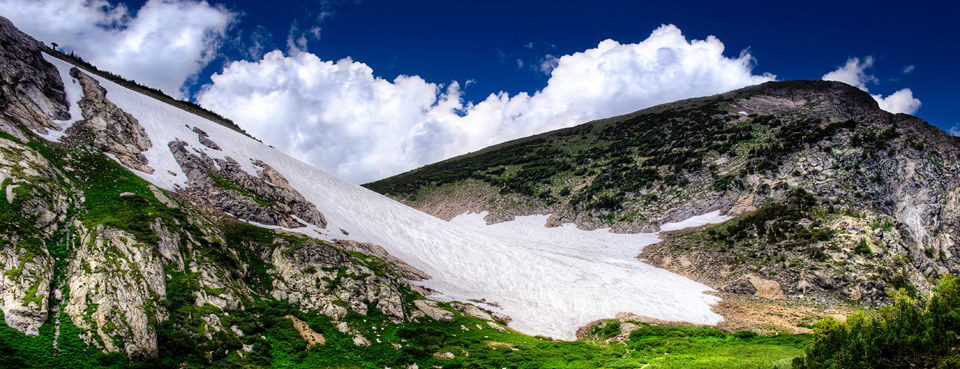
So, we have covered two basic sharpening techniques. These should help to really give a nice crisp look to your finished photos. Play around with them and see what works for you. Don’t be afraid to get creative either, because where this technique really goes nuts is when you start applying the sharpening to selective areas of your photos with layer masks and you can sharpen some things more than others. I have even applied both techniques to the same image. Bring out that texture in those rock formations or make those eyes pop a bit in that portrait. See how these techniques can really expand your post-processing skills. See before and after photos to take a look at the difference.
Happy sharpening!
-Alex


by awsmith
I just wanted to say somewhere that I’m probably not the only person who has read through most of what you have published here. I know it took time to do all this so I felt someone should say thanks… so THANKS. 🙂